Lessons learned implementing Sign in with Apple on iOS
At WWDC 2019, Sign in with Apple was introduced as a new way for apps to authenticate users with their Apple ID in a few steps. Following the App Store Guidelines, this new feature is a requirement for all apps that support social logins (with some exceptions).
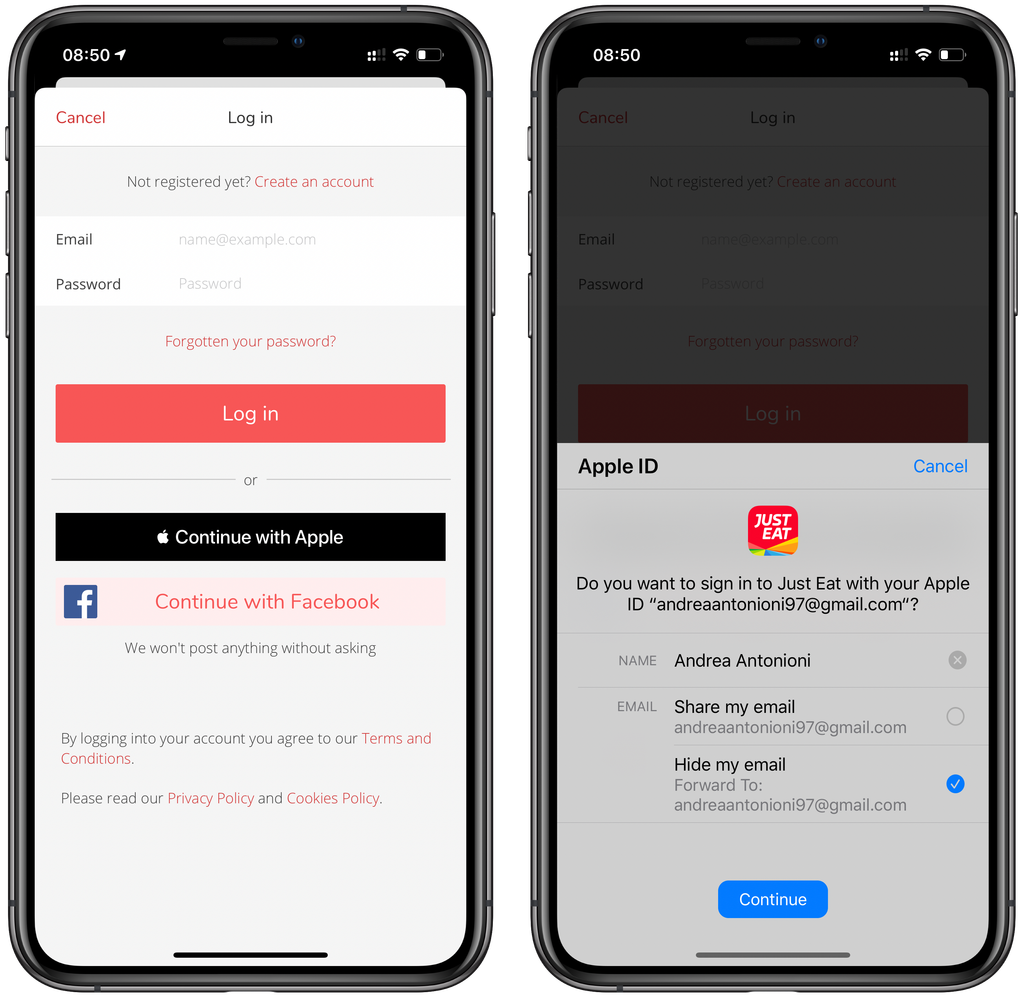
At Just Eat we didn't see Sign in with Apple as a required feature we needed to implement. Instead, we took it as an opportunity to provide a more secure and easy way to log in for our customers around the world.
For my team (Identity&Protection) it was the first time we implemented an Apple feature which was brand new for everyone. The documentation was a good starting point but we faced some edge cases that may prevent the user to log in if not handled properly. Moreover, we refactored our code on iOS in order to integrate Sign in with Apple with the existing social providers and the native login.
This is what we learned along the journey about implementing Sign in with Apple.
The initial deep dive
Even if Sign in with Apple might appear easy to understand at first, it is important to read carefully the documentation and get a clear idea of how both the authentication flow and the integration between the app, the backend and Apple work.
Here are some good starting points:
- “Introducing Sign In with Apple” session from WWDC 2019
- “What’s New in Authentication” session from WWDC 2019
- An example code with a Sign in with Apple implementation by Apple
Another good source of information that helped us to understand some edge cases was the Apple Developer Forum. There you can find some really good conversations with Apple engineers explaining some edge cases of Sign in with Apple that aren’t well documented anywhere else.
One of the features of Sign in with Apple is the ability for the user to not share their real email. In this case, Apple provides a proxy email to the app (xxxxx@privaterely.appleid.com) that can be used to get in touch with the user. Users have the same proxy email in all the apps that belong to the same Development Team.
Together with the email, Apple provides a user identifier which is unique for all apps written by a single development team. Apple suggests using the user property as a unique identifier in your server rather than the email, as there are some cases where the app only gets the identifier back in the response that the server can use to match to an existing account.
Certificates and App capabilities
The setup of certificates and app capabilities always sounds difficult, but that is the first necessary step in the Sign in with Apple implementation journey.
We added the Sign in with Apple capability using Xcode and then got the private key and the Key ID from the Certificates, Identifiers & Profiles section of our account in the Apple Developer Portal. This is what is needed by the backend to verify the user identity with the Apple server.
That was pretty easy, but we know that things are often more complicated than they might appear. In our Xcode project, we have 3 different build configurations: Debug, Internal and App Store. Each of these configurations has different bundle ID and App ID in the Apple Developer Portal. As the name suggests, we use Internal to distribute the app internally for testing purposes. This configuration is signed with an Enterprise certificate and – similarly to Apple Pay – Sign in with Apple is not available in the Enterprise License, so Sign in with Apple cannot work for internal builds.
If you have a similar configuration, remember to remove the Sign in with Apple capability from your Internal configuration otherwise you’ll get an error when trying to distribute the app internally.
Another edge case to consider is that the App ID is used as the client_id parameter from the backend through the interactions with the Apple server. Debug and App Store have 2 different App IDs, so each of them has its own private key and Key ID: basically, they’re managed as 2 different apps. You can avoid this by grouping Debug with App Storemarking the last one as Primary App ID. For more details on this procedure, check this help page from Apple.
Integrating Sign in with Apple with Facebook and Google SDKs
At Just Eat we use a Modular Architecture on iOS and the Account module is responsible for managing login and signup in the app. We already support Facebook and Google in some countries using a SocialLoginService protocol:
enum IdentityProvider {
    case facebook
    case google
}

enum SocialLoginResult {
    case success(String)
    case failure(Error)
    case cancelled
}

protocol SocialLoginService {
    var identityProvider: IdentityProvider { get }

    func login(from viewController: UIViewController, _ handler: @escaping (SocialLoginResult) -> Void)
}

class FacebookService: SocialLoginService {
    var identityProvider: IdentityProvider { return .facebook }

    func login(from viewController: UIViewController, _ handler: @escaping (SocialLoginResult) -> Void) {
        // Facebook SDK implementation
    }
}

class GoogleService: SocialLoginService {
    var identityProvider: IdentityProvider { return .google }

    func login(from viewController: UIViewController, _ handler: @escaping (SocialLoginResult) -> Void) {
        // Google SDK implementation
    }
}
Both Facebook and Google SDKs provide an access token, which the app sends to our backend in order to retrieve user information (email and name) and to create or log in into an existing account.
let socialLoginServices: [SocialLoginService] = [FacebookService(), GoogleService()]

func loginViewController(_ viewController: UIViewController, didRequestSocialLoginWith provider: IdentityProvider) {
    guard let socialLoginService = socialLoginServices.first(where: { $0.identityProvider == provider }) else { return }
    socialLoginService.login(from: viewController) { [weak self] result in
        switch result {
        case .success(let accessToken):
            print("Social SDK accessToken: \(accessToken)")
            self?.login(with: provider, token: accessToken)
        case .failure, .cancelled:
            print("Sign in flow interrupted")
        }
    }
}

func login(with provider: IdentityProvider, token: String){
    // Login request to our backend
}
By using the SocialLoginService protocol, we created the SignInWithAppleService class and in IdentityProvideradded the case apple only available for iOS 13.
enum IdentityProvider {
    case facebook
    case google

    @available(iOS 13, *)
    case apple
}

@available(iOS 13, *)
class SignInWithAppleService: SocialLoginService, ASAuthorizationControllerPresentationContextProviding {
    private weak var presentingViewController: UIViewController?
    private var handler: ((SocialLoginResult) -> Void)?

    var identityProvider: IdentityProvider { return .apple }

    func login(from viewController: UIViewController, _ handler: @escaping (SocialLoginResult) -> Void) {
        // 1
        self.presentingViewController = viewController
        self.handler = handler

        // 2
        let appleIDRequest = ASAuthorizationAppleIDProvider().createRequest()
        appleIDRequest.requestedScopes = [.email, .fullName]

        let authorizationController = ASAuthorizationController(authorizationRequests: [appleIDRequest])
        authorizationController.delegate = self
        authorizationController.presentationContextProvider = self
        authorizationController.performRequests()
    }

    private func resetStatus() {
        presentingViewController = nil
        handler = nil
    }

    // MARK: - ASAuthorizationControllerPresentationContextProviding

    func presentationAnchor(for controller: ASAuthorizationController) -> ASPresentationAnchor {
        if let presentingViewController = presentingViewController,
            let window = presentingViewController.view.window {
            return window
        } else {
            return UIWindow()
        }
    }

    // MARK: - ASAuthorizationControllerDelegate

    func authorizationController(controller: ASAuthorizationController, didCompleteWithAuthorization authorization: ASAuthorization) {
        defer { resetStatus() }

        guard let appleIDCredential = authorization.credential as? ASAuthorizationAppleIDCredential,
            let authenticationCode = appleIDCredential.authorizationCode,
            let authCode = String(data: authenticationCode, encoding: .utf8) else {
                let error = AccountErrorBuilder.error(forCode: AccountErrorCode.loginFailure.rawValue)
                handler?(.failure(error))
                return
        }

        handler?(.success(authCode))
    }

    func authorizationController(controller: ASAuthorizationController, didCompleteWithError error: Error) {
        defer { resetStatus() }
        print(error)
    }
}- We need to save both viewController and handler in order to use them in
ASAuthorizationControllerPresentationContextProvidingandASAuthorizationControllerDelegatemethods. In this casedefercomes handy so we can callresetStatusto remove references before leaving the context. - We create a request using
ASAuthorizationAppleIDProvider. In our case, we setemailandfullNamein scopes as they’re required by the backend to create an account. After that, we createASAuthorizationControllerand perform the request to show the sheet to the user.
ASAuthorizationControllerDelegate contains one method for the failure and one for the success. Sign in with Apple doesn’t return an access token like Facebook and Google. Instead, it returns an ASAuthorizationAppleIDCredential object which contains some information to send to the backend for the authorization flow. To support this difference, we had to refactor our code:
// 1
public enum SocialSignInResult {
    public enum AuthInfo {
        case accessToken(String)

        @available(iOS 13.0, *)
        case userInfo(ASAuthorizationAppleIDCredential)
    }

    case success(AuthInfo)
    case cancelled
    case failure(Error)
}

@available(iOS 13, *)
extension SignInWithAppleService: ASAuthorizationControllerDelegate {
    func authorizationController(controller: ASAuthorizationController, didCompleteWithAuthorization authorization: ASAuthorization) {
        defer { resetStatus() }

        // 2
        switch authorization.credential {
        case let appleIDCredential as ASAuthorizationAppleIDCredential:
            let authInfo = SocialSignInResult.AuthInfo.userInfo(appleIDCredential)
            handler?(.success(authInfo))
        default:
            let error = AccountErrorBuilder.error(forCode: AccountErrorCode.loginFailure.rawValue)
            handler?(.failure(error))
        }
    }

    func authorizationController(controller: ASAuthorizationController, didCompleteWithError error: Error) {
        defer { resetStatus() }
        print(error)
    }
}

func loginViewController(_ viewController: UIViewController, didRequestSocialLoginWith provider: IdentityProvider) {
    guard let socialLoginService = socialLoginServices.first(where: { $0.identityProvider == provider }) else { return }
    socialLoginService.login(from: viewController) { [weak self] result in
        switch result {
        case .success(let authInfo):
            self.handleSocialLoginServiceSuccess(with: provider, authInfo: authInfo)
        case .failure, .cancelled:
            print("Sign in flow interrupted")
        }
    }
}

// 3
private func handleSocialLoginServiceSuccess(with provider: IdentityProvider, authInfo: SocialSignInResult.AuthInfo) {
    switch authInfo {
    case .accessToken(let token):
        login(with: provider, token: token)
    case .userInfo(let appleIDCredentials):
        guard let authorizationCode = appleIDCredentials.authorizationCode,
            let authCode = String(data: authorizationCode, encoding: .utf8) else {
                return
        }
        login(with: provider, token: authCode)
    }
}- In the success case we now return a
AuthInfoenum which supports both an access token and the user information represented by aASAuthorizationAppleIDCredentialobject. - We need to cast the credential property because it changes based on the request we make. In this case we put only
ASAuthorizationAppleIDRequestin the request array; in this way, we will only receive aASAuthorizationAppleIDCredentialas response. If the cast fails we have aAccountErrorBuilderclass we use internally to build errors (you can read more about this approach here). - There’s a separate method that handles the
AuthInfowe get from a success response.ASAuthorizationAppleIDCredentialcontains anauthenticationCodewhich is different from an access token you get from Facebook and Google. In this case it’s our backend that based on the social handles the param we send in a different way.
Email and Full Name
Sign in with Apple comes out with 2 different sheets that are presented in different scenarios: the first is shown to the user during the initial request and the second is shown for a confirmation request. This logic is handled by iOS, but there is a difference we need to consider in the implementation.
In fact, user information is shared with the app only in the initial request. Following requests will only contain the user identifier. There are 2 important things to point out here:
- The backend is able to retrieve
emailusing theauthenticationCode(this was not 100% true for us, in fact, we experienced some issues retrieving the email in production and we opened a radar. At the moment we treatemailin the same way we do forfullName) - If the full name is required to create an account in your service (like our case), what would happen if you get an error from the API during the initial flow?
To solve these issues, we store both email and fullName in the keychain. In this way, we can use them the second time the user will try again. As soon as the app receives a success response from the backend and we are confident an account has been created, we can clean up the keychain.
private func handleSocialLoginServiceSuccess(with provider: IdentityProvider, authInfo: SocialSignInResult.AuthInfo) {
    switch authInfo {
    case .accessToken(let token):
        login(with: provider, token: token)
    case .userInfo(let appleIDCredentials):
        guard let authorizationCode = appleIDCredentials.authorizationCode,
            let authCode = String(data: authorizationCode, encoding: .utf8) else {
                return
        }

        if let email = appleIDCredentials.email, let fullName = appleIDCredentials.fullName {
            keychain.signInWithAppleEmail = email
            keychain.signInWithAppleFullName = fullName
        }

        login(with: provider, token: authCode) { [weak self] success in
            guard success else { return }
            self?.keychain.signInWithAppleFullName = nil
            self?.keychain.signInWithAppleEmail = nil
        }
    }
}
Support for native credentials
Sign in with Apple comes with a set of features, one of these is the support for native credentials. It is possible to use the same sheet to search for credentials in the iCloud Keychain and use them to log in the user in their existing account. To support it, we need to change the way we build the request:
public enum SocialLoginRequest {
    case checkExisting
    case create
}

public protocol SocialLoginService {
    var identityProvider: IdentityProvider { get }

    // 1
    func login(from viewController: UIViewController, request: SocialLoginRequest, _ handler: @escaping (SocialSignInResult) -> Void)
}

public struct Credentials {
    public let email: String
    public let password: String
}

@available(iOS 13, *)
class SignInWithAppleService: SocialLoginService, ASAuthorizationControllerPresentationContextProviding {
    var identityProvider: IdentityProvider { return .apple }

    // ...

    func login(from viewController: UIViewController, request: SocialLoginRequest, _ handler: @escaping (SocialLoginResult) -> Void) {
        // ...

        let appleIDRequest = ASAuthorizationAppleIDProvider().createRequest()
        appleIDRequest.requestedScopes = [.email, .fullName]

        // 2
        var authorizationRequests: [ASAuthorizationRequest] = [appleIDRequest]

        if case .checkExisting = request {
            authorizationRequests.append(ASAuthorizationPasswordProvider().createRequest())
        }

        let authorizationController = ASAuthorizationController(authorizationRequests: authorizationRequests)
        authorizationController.delegate = self
        authorizationController.presentationContextProvider = self
        authorizationController.performRequests()
    }
}

@available(iOS 13, *)
extension SignInWithAppleService: ASAuthorizationControllerDelegate {
    func authorizationController(controller: ASAuthorizationController, didCompleteWithAuthorization authorization: ASAuthorization) {
        // ...

        switch authorization.credential {
        case let appleIDCredential as ASAuthorizationAppleIDCredential:
            SocialSignInResult.AuthInfo.userInfo(appleIDCredential)
        // 3
        case let passwordCredential as ASPasswordCredential:
            let credentials = Credentials(email: passwordCredential.user, password: passwordCredential.password)
            handler?(.success(.native(credentials)))
        default:
            let error = AccountErrorBuilder.error(forCode: AccountErrorCode.loginFailure.rawValue)
            handler?(.failure(error))
        }
    }

    // ...
}- We modified
SocialLoginServiceto add aSocialLoginRequestparam that indicates if we want to check for an existing account or to create a new one. - To check for native credentials, we need to create a request from
ASAuthorizationPasswordProviderand add it to the array. - We handle a new case where we can get a
ASPasswordCredentialobject which represents the user’s credentials fetched from the iCloud Keychain. To share those credentials we use aCredentialstruct.
Now we can generate two different types of requests with Sign in with Apple. As Apple suggests, we look for an existing account when we present the login screen, while we create a new account when the user taps on the Sign in with Apple button.
class LoginFlowCoordinator {

    func begin() {
        // ...

        if #available(iOS 13, *){
            let appleService = SignInWithAppleService()
            showSignInWithAppleSheet(with: appleService)
        }
    }

    @available(iOS 13, *)
    private func showSignInWithAppleSheet(with appleService: SocialLoginService) {
        appleService.login(from: loginViewController, request: .checkExisting) { [weak self] result in
            guard let self = self else { return }
            switch result {
            case .success(let authInfo):
                self.handleSocialLoginServiceSuccess(with: .apple, authInfo: authInfo)
            case .cancelled, .failure:
                break
            }
        }
    }

    func loginViewController(_ viewController: UIViewController, didRequestSocialLoginWith provider: IdentityProvider) {
        guard let socialLoginService = socialLoginServices.first(where: { $0.identityProvider == provider }) else { return }
        socialLoginService.login(from: viewController, request: .create) { [weak self] result in
            // ...
        }
    }
}
Managing the user session
From the Apple documentation:“your app is responsible for managing the user session”. This is because a user can decide to revoke the association between its Apple ID and our app from the Settings app. When this happens the backend will not be notified by Apple: in fact, it is the app’s responsibility to manage this case adding some extra checks. After a session is revoked, Apple suggests logging out the user and showing a login screen.
We created the SignInWithAppleRevokedManager class that performs the check in applicationDidBecomeActive and takes care to log out the user and show the login screen.
@available(iOS 13, *)
final class SignInWithAppleRevokedManager {

    func checkSessionStatus() {
        guard let userID = keychain.signInWithAppleUserID else { return }
        let authorizationAppleIDProvider = ASAuthorizationAppleIDProvider()
        authorizationAppleIDProvider.getCredentialState(forUserID: userID) { (credentialState, error) in
            if let error = error {
                print(error)
                return
            }

            if case .revoked = credentialState {
                DispatchQueue.main.async { [weak self] in
                    self?.userDidRevokedSession()
                }
            }
        }
    }

    private func userDidRevokedSession() {
        guard loginService.isUserLoggedIn, keychain.signInWithAppleUserID != nil else { return }
        loginService.logout { [weak self] in
            self?.keychain.signInWithAppleUserID = nil
            self?.showLoginAlert()
        }
    }
}
We need to store the user identifier in the keychain during the login flow and remember to remove it when the user logs out. Before logging the user out, we need to make sure that they are still logged in via Sign in with Apple (as users could have logged in with a different account since the login via Sign in with Apple).
Conclusion
We faced some issues in production during the rollout but we were able to mitigate them thanks to metrics, logs and our feature flag system. Sign in with Apple is still on its first version and we advise keeping a lookout for edge cases that are not covered in the documentation. Our implementation is now live on the Just Eat platform, we’re receiving very good feedback from users and we think it will become a key feature to offer a secure and easy way to log in to mobile apps.
Originally published on JustEat tech blog.